Sewing a zipper pouch is quite easy and it takes approximately 30 minutes (even less if you are a bit more experienced). It’s a nice little project whether you want to make something for yourself or your friends. Let’s get started then…
I came across this beautiful sewing theme fabric (the one I use here for the pouch) in my local fabric store and I thought I can make a pouch for all my sewing tools…scissors, bobbins, needles, threads, etc.
Materials:
- Two outer fabric pieces in the desired dimensions – I used 12.5″ x 10.5″
- Two inner fabric pieces – the same dimensions as the outer fabric – I used 12.5″ x 10.5″
- Two pieces of iron on interface – I used 12.5″ x 10.5″
- One zipper long enough to cover the edge of the fabric
Tip: You can use any zipper that is longer than the desired length as you can cut it and adjust it as required. I will show you below how to do that.
Seam Allowance: 5/8″ or 1.5cm
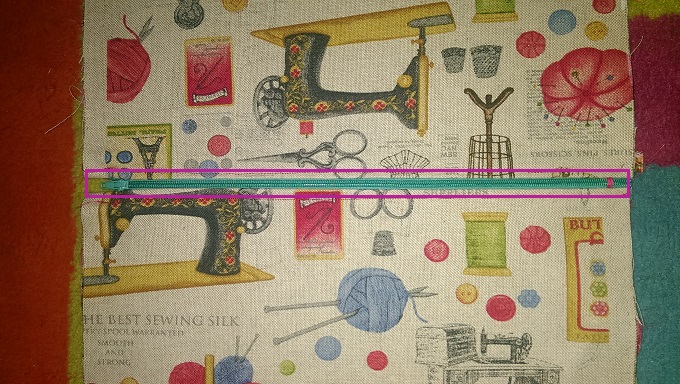
Adjusting long zippers:
If your zipper is too long, mark 1/2″ from the edge of the fabric, align it in the centre under the presser foot at the mark you made earlier and set your machine to a wide zig-zag stitch with a very short length.
Before you start sewing the actual mark on the zipper, it is a good idea to test that the stitch is right. On a section of the zipper that will be cut off later, hand crank your machine to avoid hitting the zipper and sew a few stitches and backstitch over them. Once you are happy with the needle and stitch set up, proceed with sewing the mark of the desired zipper length and cut off the excess zipper piece.

Sewing the zipper pouch:
Gather all your materials and we are ready to start sewing…
Note I have already ironed the interfacing on the wrong side of each piece of the outer fabric. You will notice later on from the pictures below that the wrong sides of the outer fabrics appear black. This is because due to applied interfacing).
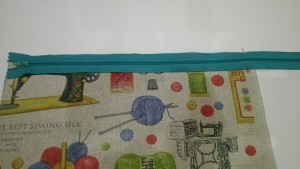
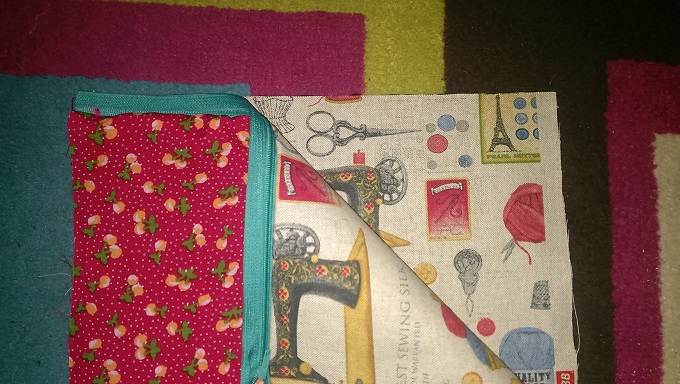
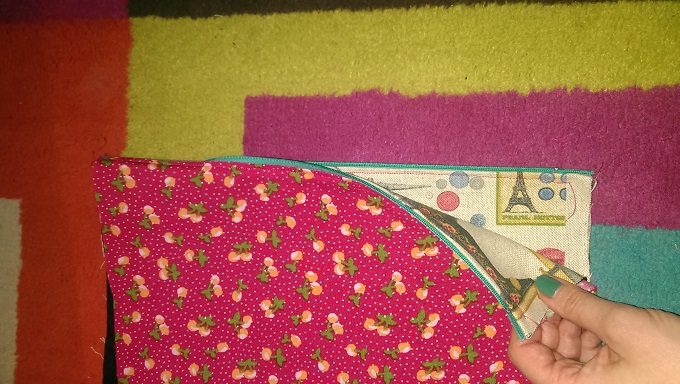
Step 1: Align the zipper with one piece of the outer fabric right sides together matching the edges (i.e. right side of the zipper should be facing the right side of the fabric). Switch to a zipper foot on your sewing machine and stitch the zipper to the fabric.
Step 2: Place one of the inner fabric pieces on top of the outer fabric (the one with the sewn zipper) with their right sides facing each other. The inner fabric top edge should be aligned with the sewn zipper – this is where you will sew it following the same stitching line from the previous step.
Step 3: Take the second piece of the outer fabric, align it with the free zipper end (i.e. the one that hasn’t been sewn yet) right sides together and sew along.
Step 4: Place the second piece of the inner fabric on top of the second outer fabric right sides together. You will notice that the right side of the second inner fabric will be facing also the right side of the first inner fabric. Sew along the edge with the zipper in order to attach the secong inner fabric.
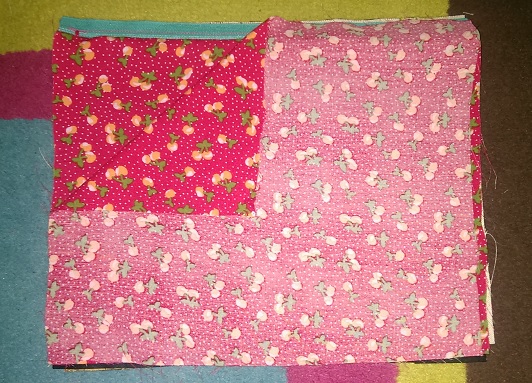
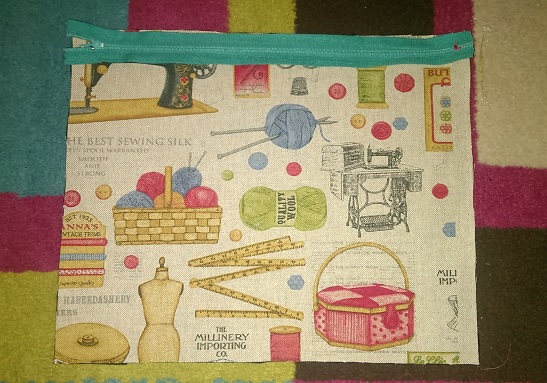
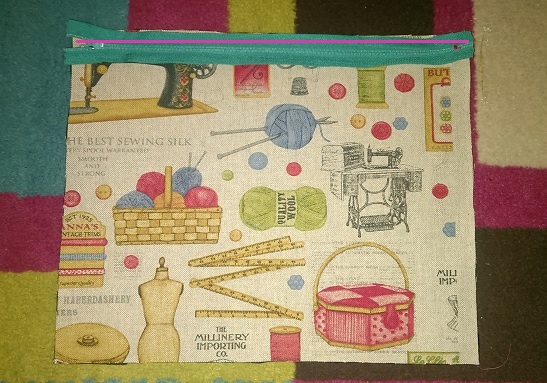
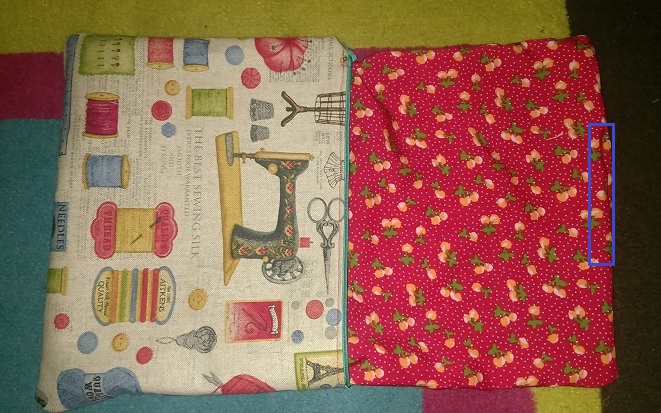
This is how your pouch should look like:

Zipper Pouch – Right Side
Zipper Pouch – Lining
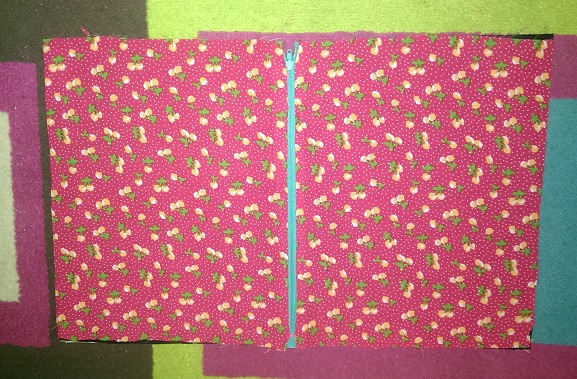
Step 5: Topstitch close to the zipper in order to prevent the fabric from popping up and getting caught.
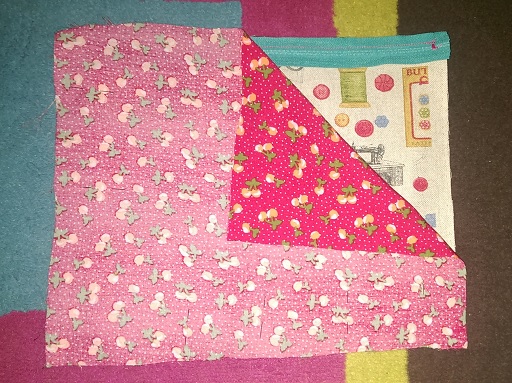
Step 6: Unzip the zipper approximately 3/4 from its end and fold the pouch with the outer fabrics facing each other. Make sure that the zipper teeth are properly aligned.
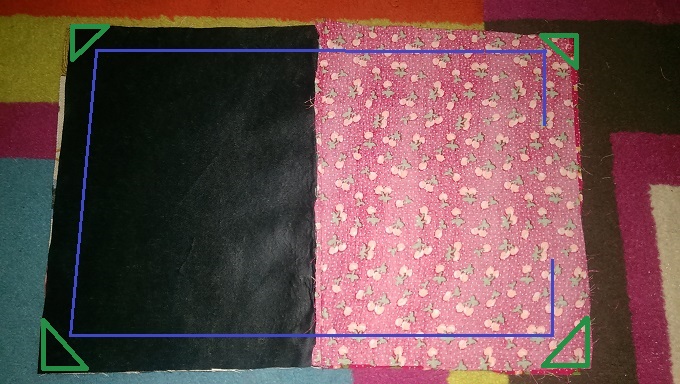
Step 7: Lift the two inner fabric pieces and place them with right sides together. Make sure that the zipper teeth are still properly aligned. Now sew your fabrics along the highlighted lines as shown below.
Note the small gap left on one edge fo the fabric; this is left on purpose so that we can turn the pouch inside out.
It is also a good idea to cut out the corners, but make sure you cut outside the stitching lines. This will create softer corners when the pouch is turned inside out later on.
Step 8: Turn the pouch inside out from the small opening that was left on the edge of the fabric earlier and make sure all the corners appear sharp (you can use your fiingers, a pen or any soft pointy object for that). Fold the edges of the lining that was left open to the inside and hand finish them with a blind stitch for an invisible seam (I have used the blind stitch here) or you can topstitch along the egde.

Push the lining inside and you are done…Your new zipper pouch is ready!
