I love wearing hats, especially when it’s really cold outside… (well, I always wrap up anyway). However, when I wear a hat my hair looks flat and I’m not happy about it.
Sometimes I also like to put my hair up in a ponytail, but again some hats can be too tight to wear. So, I thought a beanie hat would be the solution…
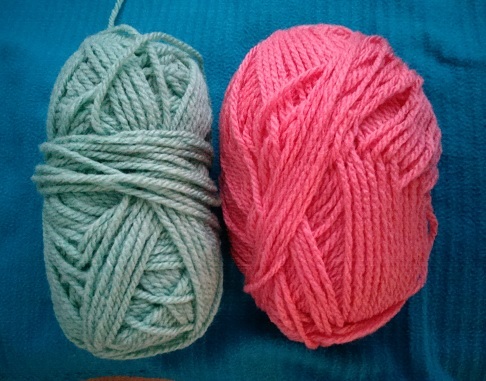
I bought light mint green yarn, but I thought it looked a bit boring on its own, so I added a little bit of a funky touch to it by using bright coral as a second colour.
I worked out my own pattern with alternate rows of knitting and purling. You can download the Beanie Hat pattern below:
Slouchy Beanie Hat – Free Pattern
This is a first glimpse of the pattern after one round of the main pattern:
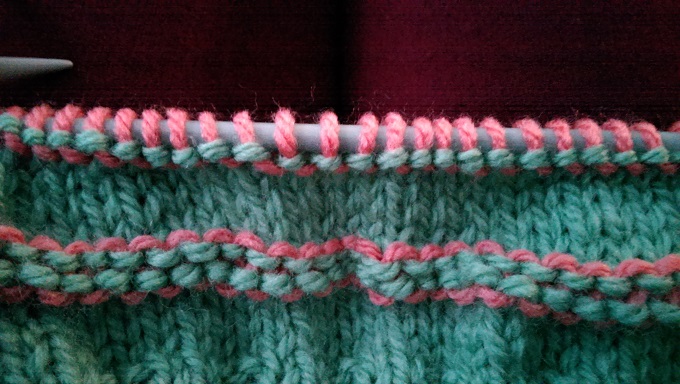
Beanie hat pattern preview – Right side

Beanie hat pattern preview – Wrong side
Below you can find pictures that show how to alternate between the two colours throughout the pattern…
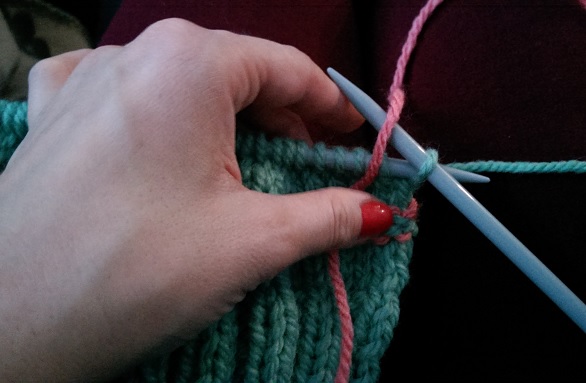
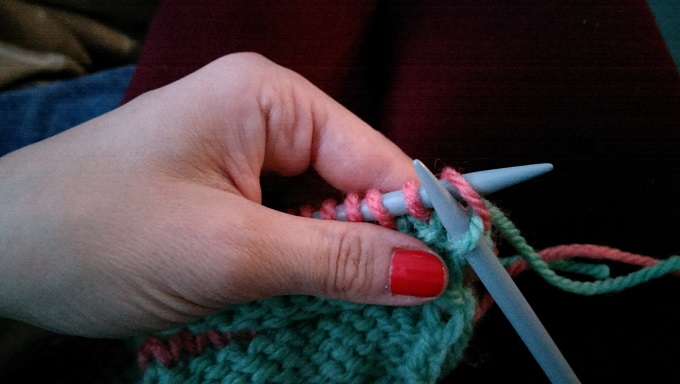
How to purl with the second colour yarn:
Step 1: Put your right needle through the last knitted loop as if to purl, take the second colour yarn, hold the free end with your left hand and wrap it around the needle as if to purl.
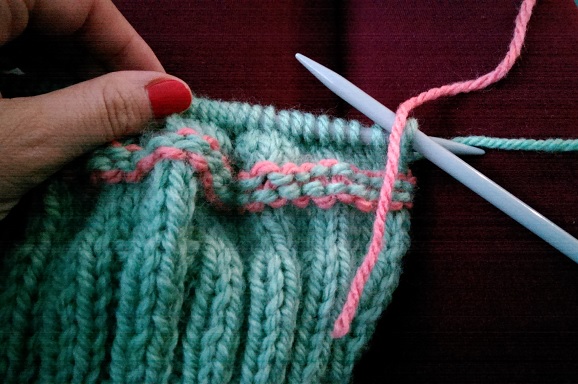

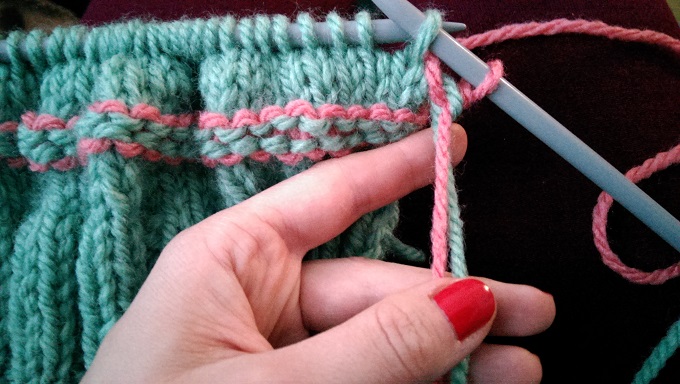
Step 2: Pull the needle through the loop and you should have the first new purl stitch in the second colour. Carry on with 2-3 more purl stitches still holding the free ends of the two yarns together to ensure the purled stitches are not too loose. You can secure them together with a little knot and you can cut off the long end of the main colour (you will need to use it again in the next row).
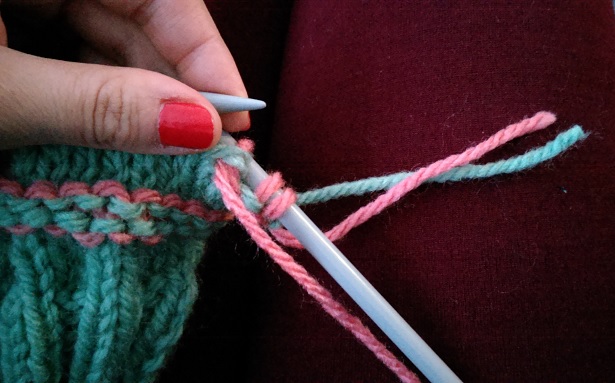
How to knit with the main colour yarn (after you have purled with the alternate colour above):
Step 1: Put the right needle through the last purled stitch of the alternate colour, take the main colour yarn and wrap it around the needle as shown in the pitcure below. Make sure the free end of the main colour is at the back and the longer part at the front.
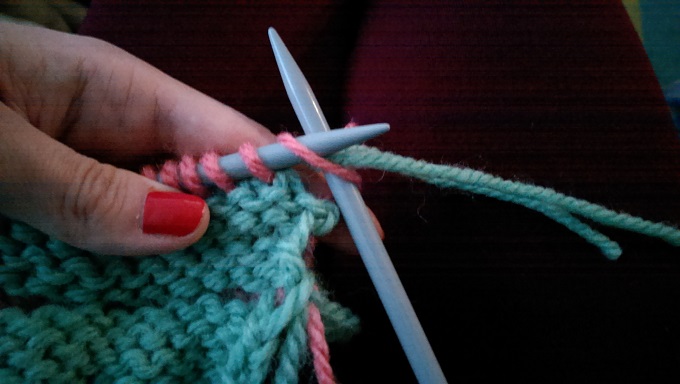
Step 2: Pull the needle through the loop and you should have the first knit stitch in the main colour. Carry on with 2-3 more knit stitches still holding the free ends of the two yarns together to ensure the knitted stitches are not too loose. Secure them together with a little knot and cut off the long end of the alternate colour yarn.
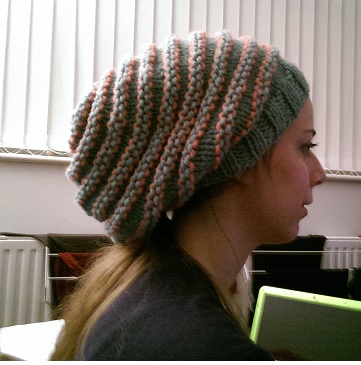
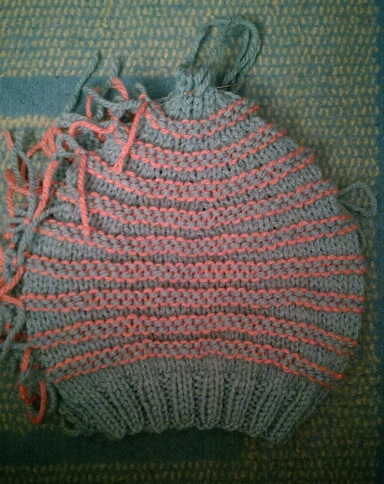
When I finished my beanie hat looked like this:
You can see the raw edges with the little knots between the two alternate colours. At this point secure each pair of the two colours with a double knot and cut off the excess yarn.
Turn the hat to the wrong side and sew the side seam with the tapestry needle. Make sure that each row of the pattern as appear on the right side of the hat is aligned so that they appear even (knit rows aligned with kint rows and purl rows aligned with purl rows).
This is the final result… my slouchy beanie hat…